Search

shirishweb

talk less, code more

Category

Computer Tips and Tricks

PowerShell is a task automation and configuration management framework from Microsoft, consisting of a command-line shell and associated scripting language. PowerShell is a very powerful tool for automating various windows tasks. Here we will learn to use powerShell as a commandline tool for creating archives (zip) files from folder containing files.

I am using windows 10 pc which comes with powershell version 5.1

I have a folder structure as follows.

I have a folder called Software Documentations with contains 7 files.

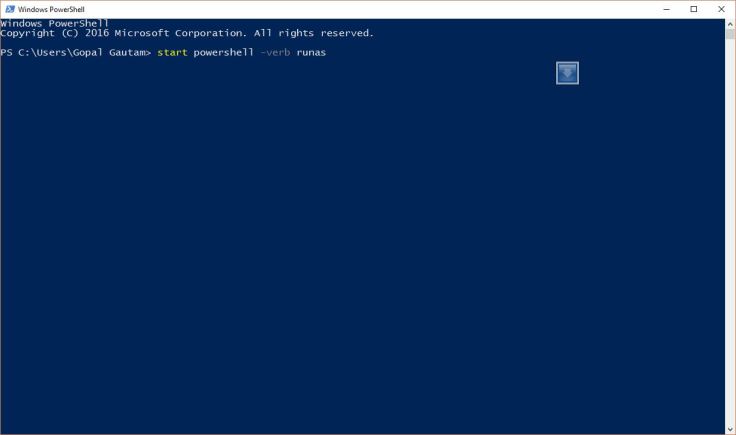
Using the explorer address bar, we can start a new powershell session using this current directory.

Since powershell leverages use of .net classes, we will use “System.IO.Compression.FileSystem” class and load it in powershell session as

Add-type -A System.IO.Compression.FileSystem

We will create instance of this class in a powershell variable called $cls

$cls = [IO.Compression.ZipFile]

Now lets see what static functions are provided by our ZipFile class

$cls | Get-Member -static

We can see that we have methods “CreateFromDirectory” and “ExtractToDirectory” which we are interested on.

Now lets begin creating zip file using method CreateFromDirectory

First we need to make sure we are in correct directory

ls

Lets save the directory path of our desired folder to be zipped (which is “3. Software Requirement Specification” in my case”) into powershell variable $source

$source = (gi '3. Software Requirement Specification').FullName

Make sure $source has some value in it

$source

Now lets use our static “CreateFromDirectory” method to convert this folder to a zip file called “myzip.zip”

$cls::CreateFromDirectory($source, "myzip.zip")

Yes, we verified we have a our zip file “myzip.zip” in the same directory.

Now lets demonstrate extracting same zipped file to a new folder “myzip_extracted” folder using “ExtractToDirectory” method provided by our $cls

$cls::ExtractToDirectory('myzip.zip', 'myzip_extracted')

And we can see that it worked and created myzip_extracted folder and put all my files from the zipped archive to this folder.

Hunting for processes holding network port

Many times, we may encounter certain errors within the application showing some strange errors with network issues. Like XAMPP showing error when apache is started complaining that the port is already in use. In such case, we need to find which service/program is using the port and reconfigure the application/service as per the requirement.

Today I will be showing how to hunt for such process using the powershell in windows system step by step. Lets hunt for process holding the network port 80.

  • First start run and type in powershell to start powershell terminal1. Powershell in run
  • Run this command

start powershell -verb runas

2. Start powershell in elevated mode

  • to start another powershell terminal in elevated [administrator privileged mode]
  • Run command

netstat -aonb

3. Netstat command

  • to view all the listening / established / connected ports with details
  • Since this is a long list, looking for specific port might be difficult, so we cant search this list output by using command

    netstat -aonb | findstr :80

5. Grep 80 port from netstat

  • It shows that the process with PID 4088 is holding that port.
  • Now lets find the process with that PID ie 4088. To do this, we can any of two commands as

tasklist | findstr 4088

OR

Get-Process -PID 4088

6. Grep process with pid

  • Voila, we have hunted the process we are looking for. Now we know that port 80 is used by process httpd.exe.

Installing Webmin tool on CentOS 7

Webmin is a free system administrator’s tool which gives the admin the direct configuration of the linux system through web. Thus eliminating the hard-to-remember linux commands. Actually this tool can be used for quick modifications on the linux system like setup user accounts, Apache, DNS, file sharing and much more. If you don’t know the exact commands to configure any aspects of the linux command line system, webmin is your tool.

Installation procedures:

  1. Download the webmin rpm through wget
  2. wget http://prdownloads.sourceforge.net/webadmin/webmin-1.820-1.noarch.rpm
  3. installed required dependencies
  4. yum –y install perl perl-Net-SSLeay openssl perl-IO-Tty
  5. install web from the rpm package
  6. rpm –U webmin-*.rpm

That’ it. It now installed in your system. Now browser https://localhost:10000

If in case of SSL related problem and want to disable it, we can change it in configuration

vim /etc/webmin/miniserv.conf

and change the line containing

ssl=1

to

ssl=0

and open the link  http://localhost:10000 again and login with your root account

Increase you internet speed by limiting QoS.

There is a feature in windows machine where the Microsoft reserves your some percentage of your internet bandwidth speed. QoS packet scheduler Provides traffic control on a network using IPSEC and applications and equipment supporting the quality of service. The service also manages the quality of bandwidth. In fact the service is expected to provide a kind of intelligent allocation of bandwidth between applications where the need is greatest. for this purpose the 20% is also has been denied by Microsoft. If you do not use netmeeting or windows media player (to play internet stream, streaming) you can disable it.

For this,

  • go to run (Win +R )
  • in the run-box type in gpedit.msc
  • A Group Policy window appears. Go to Computer Configuration > Administrative Template > Network. Open QoS packet scheduler and select limit reservable bandwidth and put the value ( between 0-100 ) in the Bandwidth limit % box. Minimum value ensure greater increase in internet speed or you can disable it by selecting not configured.

QoS feature  is not available in Window 7.

BLOCK ANY WEBSITES ON YOUR FRIEND’S COMPUTER!!!

This tutorial will teach you “how to block specific website on a computer”

If you are running Vista/Window7 , you need to have administrative right. For this you need to log on windows with your account with administrative rights(to access the folder system32)

Now just Go to My computer and then go to the C:\ drive or whichever is your root drive. Then just go to Folder “windows” and then to “system32” folder. There you can see another folder “drivers” , just double click it. Then go to folder “etc” . Overall you are in:

C:\windows\system32\drivers\etc

there you can see a file named hosts. Just open a notepad and drag and drop the file to the notepad. This will show you a some lines of texts as “This is a sample host file used by…………”. If you see this you’re right in the place where you should be. Now just below the 127.0.0.1 write another 127.0.0.1 (this is the ip address the computer i.e source ip address) and press tab and then type in the address of the website that you want to block and save it (CTRL + S).This will do it! Now the computer will be blocked to the specified website…You can check by going to the website through your internet browser.

Note: you can also open hosts file by typing following in the cmd(command)

notepad “C:\windows\system32\drivers\etc\hosts”

and modified the contents as your requirement.

Amazing Stuffs that can be added to your Browser

Image

This slideshow requires JavaScript.

Add a multifunction clock to your desktop

Windows 7 includes some useful utilities like a calculator and the snipping tool. What it lacks, however, is an alarm clock and a stop watch.

If you use the Google Chrome browser, here’s how you can add a multifunction clock to your desktop:

First, install the Clock app by Google, from the Chrome Web Store.

Next, click on the Clock app from your list of Chrome apps to launch it. The clock will launch into the time and date tab first. The other tabs are for world clock, alarm, timer, and stop watch.

Windows users who want to launch it from the taskbar, can pin it there. Just right-click on the Clock app from your Chrome app list, then select “Create shortcut.” Make sure that “Pin to Taskbar” is checked then click the “Create” button.

That’s it. Now you’ve got cool little multifunction clock on your desktop that works even when you’re offline.

View slideshows of local files in Firefox

You use Firefox (or another browser) to view photos on Facebook, Picasa, and other photo-sharing sites, and with Slide Show Viewer, a Firefox extension, Windows users can use Firefox to view slideshows of the photos stored on their hard drive.

After installing the add-on (you can download it here), you’ll find it located in the tools menu. You can find the tools menu by going to Option and clicking Menu Bar to show that toolbar. Then from Tools in the menu bar you’ll see Slide Show Viewer listed. (You can also add an icon for Slide Show Viewer to the menu bar by following this path View > Toolbars > Customize and then dragging it from the list to the menu bar.

Click Slide Show Viewer from the Tools menu and it opens in a new tab. From the menu in the upper-right corner of the page, you can navigate to a folder to view. In my experience, I could view only folders containing images. I couldn’t, for example, view a folder of Office docs, though I’m not sure why anyone would want to watch a slideshow of Word and Excel docs.

To flip through pictures when viewing a slideshow, you can use the arrow keys (right or up arrow to move forward, left or down arrow to move back) or the mouse buttons (left button to move back and the right mouse button to move forward). You can use your mouse’s scroll wheel to pan and scroll on full-size images that are too large to fit in your Firefox window.

Unfortunately, I couldn’t find any way to play a slideshow where it would automatically flip through photos in a given folder. Also, I couldn’t play a folder that contained folders of photos. For example, I could not view the Pictures folder but had to drill down to either the Sample Pictures or the Stage folder to view images.

From the control panel in the upper-right corner, you can use two check boxes to view the full image or have it cropped to fit your browser window. You can use the Escape key to hide and restore the control panel

Create a free website or blog at WordPress.com.

Up ↑